
Stainless railing renovation steps: a complete guide 2026
TL;DR:
- Proper assessment and preparation are essential for safe and effective stainless steel railing renovation.
- Using the right tools, materials, and proper cleaning techniques ensures durability and long-term appearance.
- Regular inspection and maintenance extend the lifespan of renovated inox railings and improve property value.
When stainless steel railings start to look dull, feel loose, or show early signs of rust, the problem goes beyond appearance. A neglected railing is a safety risk, and in many cases, it quietly lowers the perceived value of your entire property. Whether you manage a residential building or are renovating your own home, getting your inox railings back to their best condition requires a clear plan, the right materials, and a structured approach. This guide walks you through every phase of the renovation process, from initial assessment to long-term maintenance, so you can make confident, informed decisions at every step.
Table of Contents
- Assessing your stainless railing: Safety and style check
- Gathering tools and materials for stainless railing renovation
- Step-by-step process: Renovating your stainless railing
- Common pitfalls and troubleshooting
- Finishing touches: Inspection, maintenance, and long-term care
- What most guides miss about stainless railing renovation
- Need expert help or premium materials?
- Frequently asked questions
Key Takeaways
| Point | Details |
|---|---|
| Start with inspection | Assess your stainless railing for safety, code compliance, and appearance before planning renovations. |
| Use the right tools | Having proper materials and safe procedures can boost project efficiency and outcome quality. |
| Follow proven steps | A systematic approach reduces errors during disassembly, cleaning, and reassembly. |
| Stay proactive with maintenance | Routine care and inspection help your renovated railings stay safe and beautiful for years. |
Assessing your stainless railing: Safety and style check
Before touching a single bolt, you need to understand exactly what you are working with. A thorough assessment saves time, prevents costly surprises, and helps you decide whether you need minor repairs or a full overhaul. Think of this step as your renovation foundation.
Start by checking for safety hazards. Run your hand along the full length of the railing and apply light lateral pressure. Any movement, wobble, or creaking is a red flag. Look closely at the mounting points where the railing meets the wall or floor. Loose anchors, corroded fasteners, and cracked base plates are common issues in older installations.
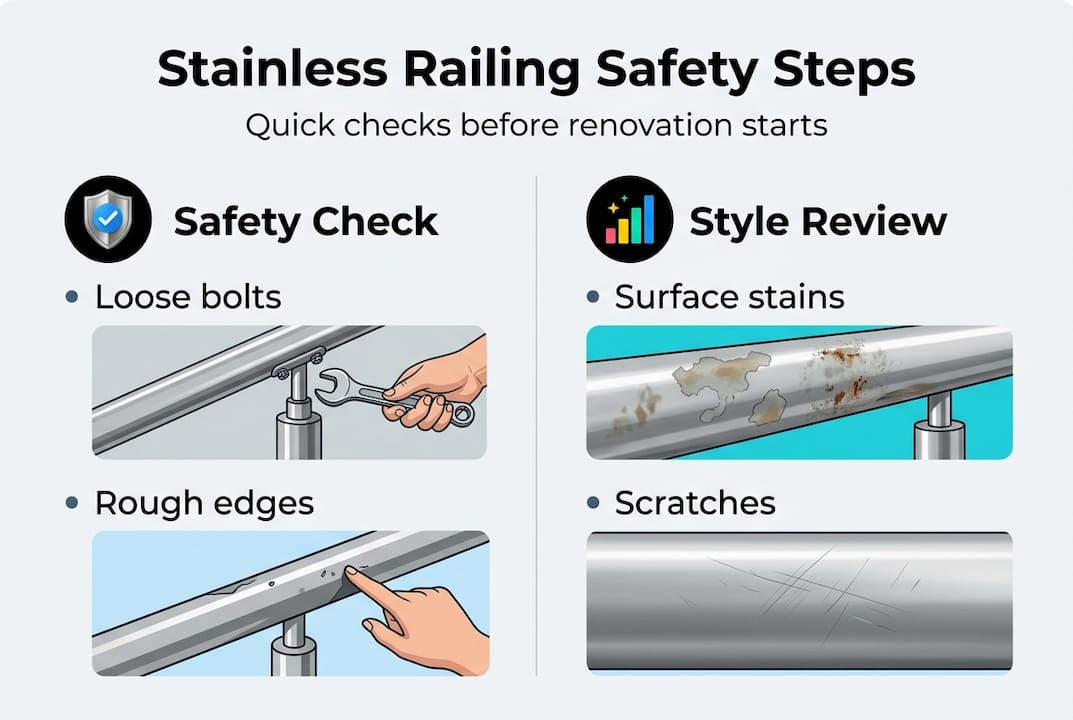
Next, evaluate the visual condition. Scratches, surface staining, and faded finishes are cosmetic problems, but they can signal deeper corrosion if left unaddressed. Pay attention to weld points and joints, where discoloration often starts first.
Here is a quick checklist of what to look for during your assessment:
- Loose or missing fasteners and end caps
- Rust spots or surface pitting on the inox surface
- Scratches that penetrate the protective oxide layer
- Bent or misaligned sections
- Outdated design that no longer matches the space
- Gaps or separations at joints and connection points
Local building codes in Bulgaria also set specific requirements for railing height, load capacity, and spacing between balusters. Regulations require routine inspection of stainless railings for safety, especially before starting major renovations. Checking compliance before you begin protects you legally and ensures the finished result meets current standards.
Use the table below to determine your renovation scope:
| Condition observed | Recommended action |
|---|---|
| Minor scratches, light staining | Clean, polish, and protect |
| Loose fasteners, surface rust | Tighten, treat, and monitor |
| Bent sections, deep corrosion | Replace damaged components |
| Non-compliant height or spacing | Full structural overhaul |
For a detailed walkthrough of what each phase involves, the step guide to railing renovation covers each scenario with practical clarity.
Pro Tip: Take photos of every angle before you start. These images serve as your before reference, help you track progress, and are invaluable for future maintenance records or warranty claims.
Gathering tools and materials for stainless railing renovation
With your railing evaluated, the next step is gathering everything you need before starting work. Arriving at the job site without the right tools wastes time and can force poor decisions under pressure. Preparation here directly affects how smooth and safe the renovation goes.
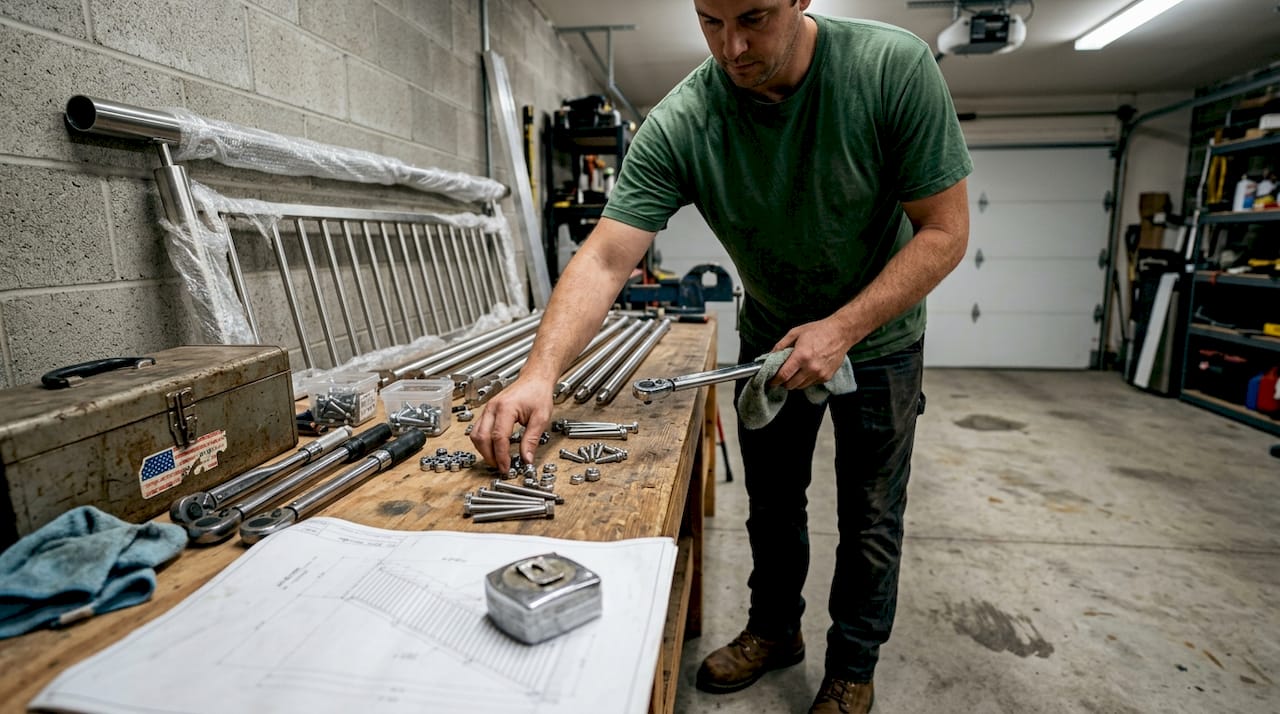
Having the right tools is essential for efficient and secure railing renovations, minimizing project risks. Studies show that proper pre-planning can reduce renovation time by up to 30%, which translates directly into lower labor costs and fewer errors.
Here is a breakdown of what you will typically need:
| Item | Type | Purpose |
|---|---|---|
| Torque wrench | Essential | Tightening fasteners to spec |
| Stainless steel cleaner | Essential | Surface preparation and finish |
| Angle grinder with polishing pad | Essential | Removing scratches and restoring shine |
| Safety gloves and goggles | Essential | Personal protection |
| Replacement fasteners (inox grade) | Essential | Structural integrity |
| Masking tape | Optional | Protecting surrounding surfaces |
| Rust neutralizer | Optional | Treating minor corrosion spots |
| Lint-free microfiber cloths | Optional | Streak-free polishing |
For personal safety, always wear nitrile or leather gloves when handling stainless steel components. Eye protection is non-negotiable when using power tools near metal surfaces. If you are working at height, a stable platform or scaffolding is required, not optional.
Material compatibility is one of the most overlooked aspects of railing renovation. Keep these points in mind:
- Use only cleaners specifically formulated for inox surfaces. Household bleach and chlorine-based products corrode the passive layer that protects stainless steel.
- Match fastener grade to the railing grade. AISI 316 fasteners for AISI 316 railings, AISI 304 for 304. Mixing grades accelerates galvanic corrosion.
- Avoid steel wool or abrasive pads. They leave iron particles embedded in the surface, which then rust.
- Choose polishing compounds rated for stainless steel, not chrome or aluminum.
For a complete list of what to source before your project begins, the guide on installation tools for railings provides a thorough breakdown organized by project type and scale.
Step-by-step process: Renovating your stainless railing
Once you have all materials on hand, it is time for the most important part: hands-on renovation. Following a structured approach ensures your railing renovation is both safe and visually effective. Skipping steps or rushing through phases is where most DIY projects go wrong.
Safety first: Always secure stairways and wear PPE before disassembling bulky railing parts. Inform others in the building that the area is temporarily unsafe.
Here is the full renovation sequence:
- Prepare the work area. Clear the space around the railing. Lay down protective sheeting on floors and nearby walls. Mark off the area if it is in a shared space.
- Disassemble if needed. Remove end caps, handrail sections, or individual balusters that require replacement or deep cleaning. Label each component to simplify reassembly.
- Clean and restore. Apply an inox-specific cleaner to all surfaces. Work in the direction of the grain to avoid cross-grain scratches. For stubborn stains, use a paste of baking soda and water as a gentle abrasive.
- Replace damaged parts. Swap out corroded fasteners, bent balusters, or cracked fittings. Always use components that match the original grade and finish.
- Reassemble carefully. Reattach sections in reverse order of disassembly. Use a torque wrench to tighten fasteners to manufacturer specifications. Do not over-tighten. Over-tightening compresses gaskets and can crack mounting flanges.
- Polish and protect. Apply a stainless steel polish using circular motions, then buff with a clean lint-free cloth. Finish with a protective coating or passivation spray to restore the oxide layer.
Pro Tip: Use lint-free cloths for the final polish. Terry cloth and paper towels leave micro-scratches that dull the finish over time.
You will know each step is complete when there is no visible residue, no movement in the railing, and the surface reflects light evenly. For guidance on keeping results intact after the work is done, railing maintenance basics is a practical next read.
Common pitfalls and troubleshooting
Even with careful preparation, minor or major issues can crop up during or after renovation. Knowing what to look for and how to respond quickly keeps your project on track.
Many renovation projects fail due to overlooked maintenance needs and improper material handling. The most common signs that something has gone wrong include:
- Loose joints after reassembly. Usually caused by under-torqued fasteners or worn thread inserts. Re-tighten using a torque wrench and replace any stripped hardware.
- Persistent stains or discoloration. Often the result of using the wrong cleaner. Apply a dedicated inox stain remover and rinse thoroughly with clean water.
- Odd creaking or movement. May indicate that a base plate anchor has not been fully secured, or that a wall anchor has pulled slightly. Inspect all mounting points.
- Surface rust appearing within weeks. This is typically caused by iron contamination from steel tools or abrasive pads used during cleaning. Use a passivation solution to restore the protective layer.
- Uneven finish or streaking. Caused by polishing against the grain or using a cloth that is not lint-free. Re-polish in the direction of the surface grain.
“Consistent cleaning with non-abrasive solutions is key to long-term durability.” Skipping this after renovation is one of the fastest ways to undo your work.
Knowing when to call a professional is just as important as knowing what you can fix yourself. If a railing shows structural damage at the anchor points, or if you discover that the original installation did not comply with current building codes, a licensed contractor should assess the situation. Cosmetic issues and minor hardware problems are well within DIY range. Structural problems are not. For more guidance on keeping your railing in top shape, railing durability tips covers the most effective long-term strategies.
Finishing touches: Inspection, maintenance, and long-term care
With all the heavy lifting complete, finishing and maintaining your newly renovated railing ensures it will last for decades. Ongoing inspection and proper maintenance are crucial to extend the lifespan of renovated stainless railings.
Start with a final inspection before declaring the project done. Walk the full length of the railing and check:
- All fasteners are tight and flush
- No visible gaps at joints or connection points
- Surface finish is consistent with no streaks or dull patches
- Railing height meets local code requirements
- No sharp edges or exposed metal ends
Once the railing passes inspection, set up a simple maintenance schedule. Here is what works:
- Monthly: Wipe down with a damp microfiber cloth. Check for new scratches or staining. Inspect high-traffic areas like handrail grips.
- Every 6 months: Apply a fresh coat of stainless steel protective spray. Inspect all fasteners with a wrench.
- Annually: Conduct a full safety check mirroring your pre-renovation assessment. Document findings with photos.
The table below summarizes recommended cleaning products and their appropriate use intervals:
| Product type | Use frequency | Notes |
|---|---|---|
| Inox surface cleaner | Monthly | Apply with microfiber cloth, rinse well |
| Stainless steel polish | Every 6 months | Buff in direction of grain |
| Passivation spray | Annually | Restores oxide layer after deep cleaning |
| Rust neutralizer | As needed | Use only on affected spots, rinse thoroughly |
Keep a maintenance log that records dates, products used, and any issues noticed. This record is useful for warranty claims, insurance purposes, and if you ever decide to sell the property. For a broader set of strategies, stainless railing care tips offers additional guidance organized by railing type and environment.
What most guides miss about stainless railing renovation
Looking back on the renovation process, there are a few hard-won lessons that most step-by-step guides simply do not cover. The biggest one: cheap shortcuts cost more in the long run.
Using home-grade cleaners or skipping fastener upgrades might seem like sensible savings in the moment. In practice, they accelerate corrosion and create safety risks that require expensive fixes within a year or two. True durability requires both a technical and an aesthetic approach. You cannot just tighten the bolts and call it done. The finish quality matters because it directly affects how long the protective oxide layer holds.
Homeowners also consistently underestimate how much railing finish quality affects resale value. A polished, well-maintained inox railing signals quality craftsmanship to buyers and tenants in a way that is hard to fake.
Before starting any structural work, always consult with a local expert on current building code requirements. Codes in Bulgaria are updated periodically, and what was compliant five years ago may not be today. For help making the right product choices from the start, choosing the right railings is a solid starting point.
Need expert help or premium materials?
If your renovation project calls for more than a basic refresh, Inoxify.bg offers a full range of ready-to-install stainless steel railing systems built for exactly these situations.

Whether you need rounded railing systems for curved spaces, solutions for staircases that meet code requirements, or railing kits for terraces built to handle outdoor conditions, Inoxify.bg has ready systems manufactured locally in Bulgaria using AISI 304 and 316 stainless steel. Each product is designed for straightforward installation, with custom sizing available and fast delivery across the country. Expert support is available to help you select the right system for your specific project requirements.
Frequently asked questions
How often should stainless steel railings be renovated?
Periodic renovations extend railing lifespan and ensure ongoing safety. Renovation is generally recommended every 5 to 10 years, or sooner if you notice corrosion, looseness, or visible wear.
What is the most common mistake in DIY railing renovations?
Skipping proper cleaning and using household chemicals will often damage the inox surface and undermine the renovation. Proper cleaning and compatible materials are essential for stainless steel longevity.
Can stainless railing renovation improve property value?
Yes, a well-renovated stainless railing enhances aesthetics and safety, both of which are attractive to buyers and tenants. Upgraded railings boost visual appeal and functional safety for homes and buildings.
Are special tools required for railing renovations?
Most projects require common hand tools, but power tools and specialty fasteners may be needed for more extensive repairs. Essential and optional tools are outlined in standard renovation checklists to help you plan accurately.