
Монтажни особености при парапети – Ключът към безопасността и визията
Всеки проектант знае, че над 80 процента от инцидентите по стълбища се дължат на недостатъчно защитени зони. За архитектите и строителните предприемачи в България това превръща избора и монтажа на инокс парапети в критичен момент за безопасността и модерния вид на всяка нова сграда. Тази тема предлага практични насоки и експертни сравнения, които помагат да се открият най-подходящите решения според нормативните стандарти и изискванията за функционалност.
Съдържание
- Какво представляват парапетите и ролята им
- Основни типове инокс парапети и приложения
- Критични монтажни изисквания и стандарти
- Архитектурни фактори при избор и монтаж
- Чести грешки и успешни монтажни практики
Основни изводи
| Точка | Детайли |
|---|---|
| Парапетите осигуряват безопасност | Те предотвратяват случайни падания и подсигуряват физическа бариера в опасни зони. |
| Избор на инокс парапети | Разнообразието от инокс парапети позволява адаптиране спрямо различни архитектурни изисквания. |
| Спазване на монтажни стандарти | Прецизното изпълнение на техническите изисквания е критично за безопасността и устойчивостта на конструкцията. |
| Архитектурни фактори | Функционалността и естетиката трябва да се балансират при избора на парапетни системи. |
Какво представляват парапетите и ролята им
Парапетите са конструктивни елементи с многопластова функционалност, които осигуряват физическа безопасност и естетическо оформление в различни архитектурни пространства. Структурните характеристики на парапетите ги превръщат в задължителен компонент при проектирането на сгради, външни и вътрешни пространства.
Тези конструкции представляват хоризонтални или наклонени ограждения, прикрепени към вертикални стълбове, които изпълняват няколко ключови функции. Те не само създават визуална и физическа бариера, но и предотвратяват евентуални инциденти при стълбища, балкони, тераси и други потенциално опасни зони. Според cambridge dictionary, парапетите се дефинират като системи, които осигуряват допълнителна сигурност и подкрепа.
Основните приложения на парапетите включват:
- Предотвратяване на случайни падания
- Създаване на естетически завършек на архитектурни пространства
- Обозначаване на граници и зони
- Подсилване на обща конструктивна стабилност
Професионален съвет: При избора на парапети винаги проверявайте съответствието с действащите строителни норми и стандарти за безопасност.
Основни типове инокс парапети и приложения
Инокс парапетите се характеризират с изключително разнообразие, което позволява тяхното адаптиране към различни архитектурни и функционални изисквания. Неръждаемите стомани от серия 300 предлагат широка гама от възможности за производство на парапети с различни технически характеристики.
Основните типове инокс парапети включват:
- Стълбищни парапети: вертикални конструкции с хоризонтални или наклонени елементи, подходящи за вътрешни и външни стълбища
- Парапети за балкони: открити конструкции с вертикални стойки и хоризонтални профили
- Парапети тип решетка: модулни системи с правоъгълна или квадратна структура
- Стъклени парапети с инокс профили: комбинирани системи с включени стъклени елементи
При избора на конкретен тип инокс парапет трябва да се отчитат спецификите на средата, естетическите изисквания и нормативните стандарти за безопасност. Материалите от серия 304 и 316 предлагат различни нива на корозионна устойчивост и механични качества, което ги прави подходящи за различни приложения – от жилищни сгради до индустриални обекти.
Професионален съвет: Винаги консултирайте се с професионален инженер, който може да направи точна оценка на натоварванията и изискванията за конкретното монтажно пространство.
За по-добър ориентир при избор на инокс парапет, вижте сравнението между типовете и типичните им приложения:
| Тип парапет | Типична локация | Основен плюс | Ограничение |
|---|---|---|---|
| Стълбищен | Обществени и жилищни стълби | Отлична безопасност | По-малко дизайн опции |
| Балконски | Балкони и тераси | Устойчивост на атмосферни влияния | Видима масивност |
| Решетка | Огради, промишлени зони | Лесна инсталация | По-ниска естетика |
| Стъклен с инокс | Модерни интериори | Максимална прозрачност | Изисква поддръжка |
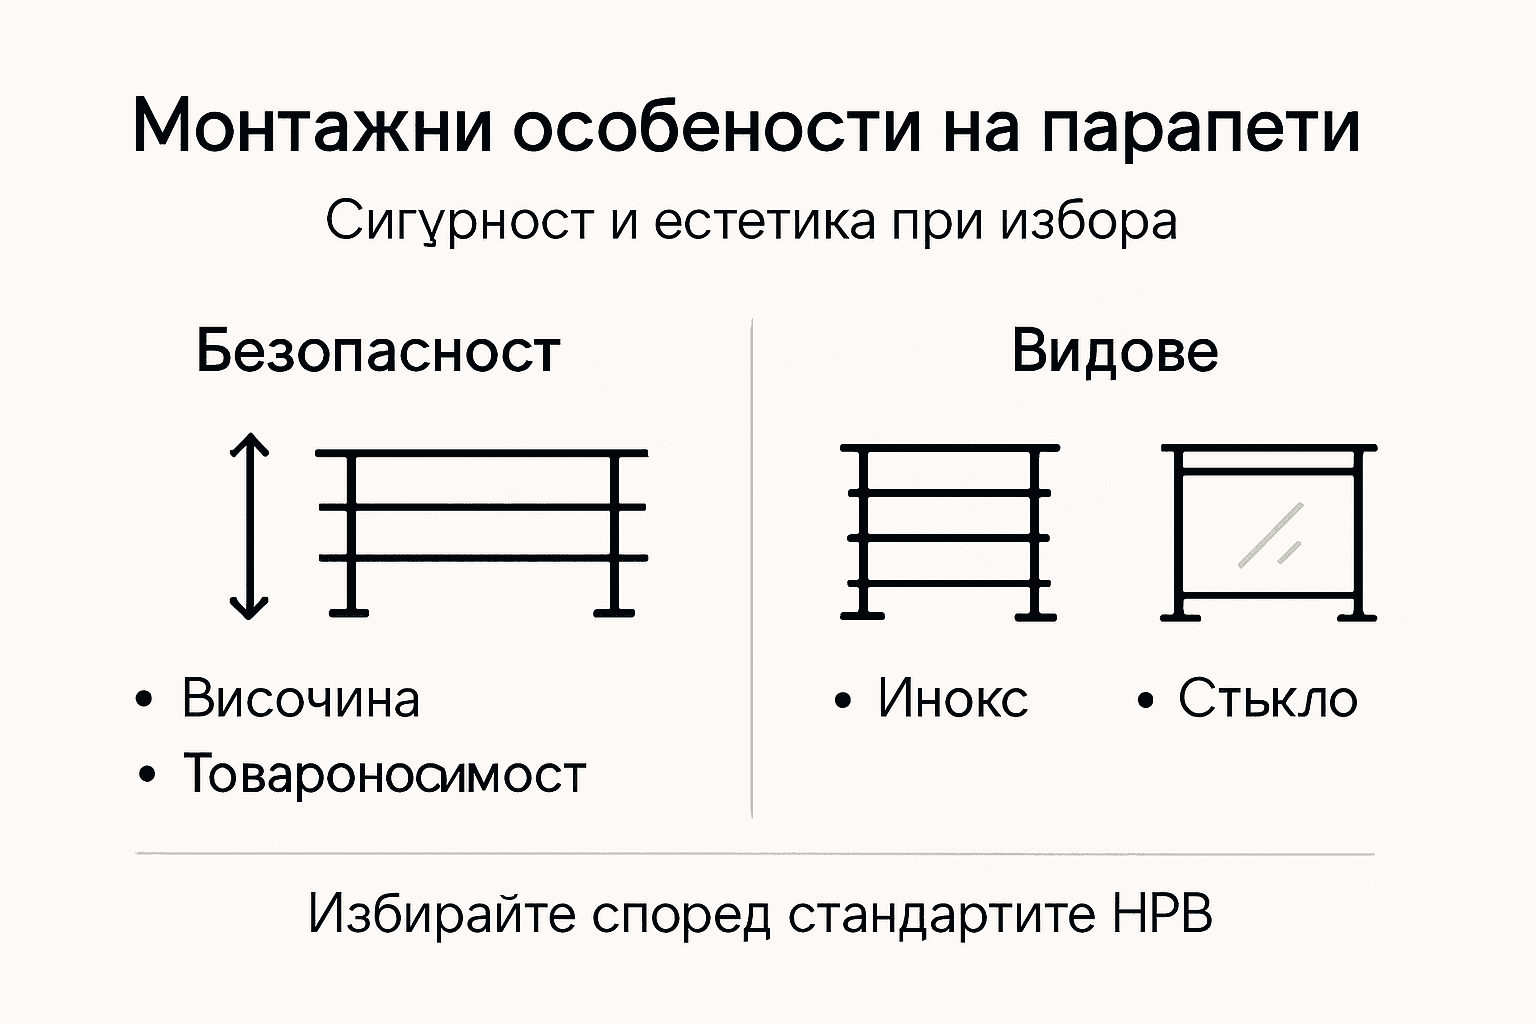
Критични монтажни изисквания и стандарти
Монтажът на инокс парапети изисква прецизно спазване на специфични технически и безопасностни стандарти. Строителните норми за парапети определят задължителни изисквания към тяхната конструкция, които гарантират максимална сигурност на ползвателите.
Ключовите параметри при монтажа включват:
- Височина на парапета (препоръчителна между 90-110 см)
- Максимално допустимо разстояние между вертикалните стойки
- Товароносимост на конструкцията
- Начин на закрепване към основата
- Гладкост и завършване на повърхността
Международните стандарти за достъпност подчертават изключителната важност на прецизното проектиране, като обръщат специално внимание на детайли като височина (между 85 и 95 см за основните ръкохватки) и безопасно завършване на краищата. Целта е да се предотврати евентуално нараняване, особено при деца и хора с увреждания.
При монтажа трябва да се вземат предвид спецификите на конкретната среда – дали парапетът ще бъде поставен на открито или закрито, какви ще са температурните и атмосферни натоварвания, и какъв е очакваният интензитет на използване.
Професионален съвет: Преди монтажа задължително извършвайте предварителни изчисления за носещата способност и консултирайте се с правоспособен строителен инженер.
Вижте ключови монтажни параметри и тяхното влияние върху сигурността и функционалността на парапета:
| Параметър | Препоръка | Влияние върху безопасността | Важно за |
|---|---|---|---|
| Височина | 90-110 см | Предпазва от падане | Всички парапети |
| Разстояние между стойки | ≤ 12 см | Забавя преминаване на деца | Жилищни зони |
| Товароносимост | Над 200 кг | Ограничава риск от счупване | Обществени места |
| Закрепване | Закрепване към здрава основа | Гарантира стабилност | Външни монтажи |
Архитектурни фактори при избор и монтаж
Архитектурният избор на парапети представлява комплексно решение, което надхвърля чисто естетическите съображения. Визуалната интеграция с околното пространство изисква прецизен подход към функционалността, безопасността и достъпността.
Ключови архитектурни фактори включват:
- Стилово съответствие с общата архитектура на сградата
- Съотношение между прозрачност и структурна стабилност
- Цветови и текстурни характеристики на материала
- Взаимодействие със светлината и околното пространство
- Възможности за персонализация и индивидуален дизайн
При избора на парапетни системи архитектите трябва да анализират множество аспекти – предназначение на помещението, интензивност на използване, climaтични условия и естетически предпочитания. Стъклените парапети например предлагат максимална прозрачност и съвременен вид, като са идеални за пространства, изискващи визуална лекота и едновременно запазване на усещането за простор.
Техническите параметри като товароносимост, устойчивост на атмосферни влияния и лекота на поддръжка са не по-малко важни от чисто визуалните характеристики при вземане на архитектурно решение.
Професионален съвет: Консултирайте се с архитектурен специалист, който може да направи цялостна оценка на пространството и да препоръча найподходящото парапетно решение.
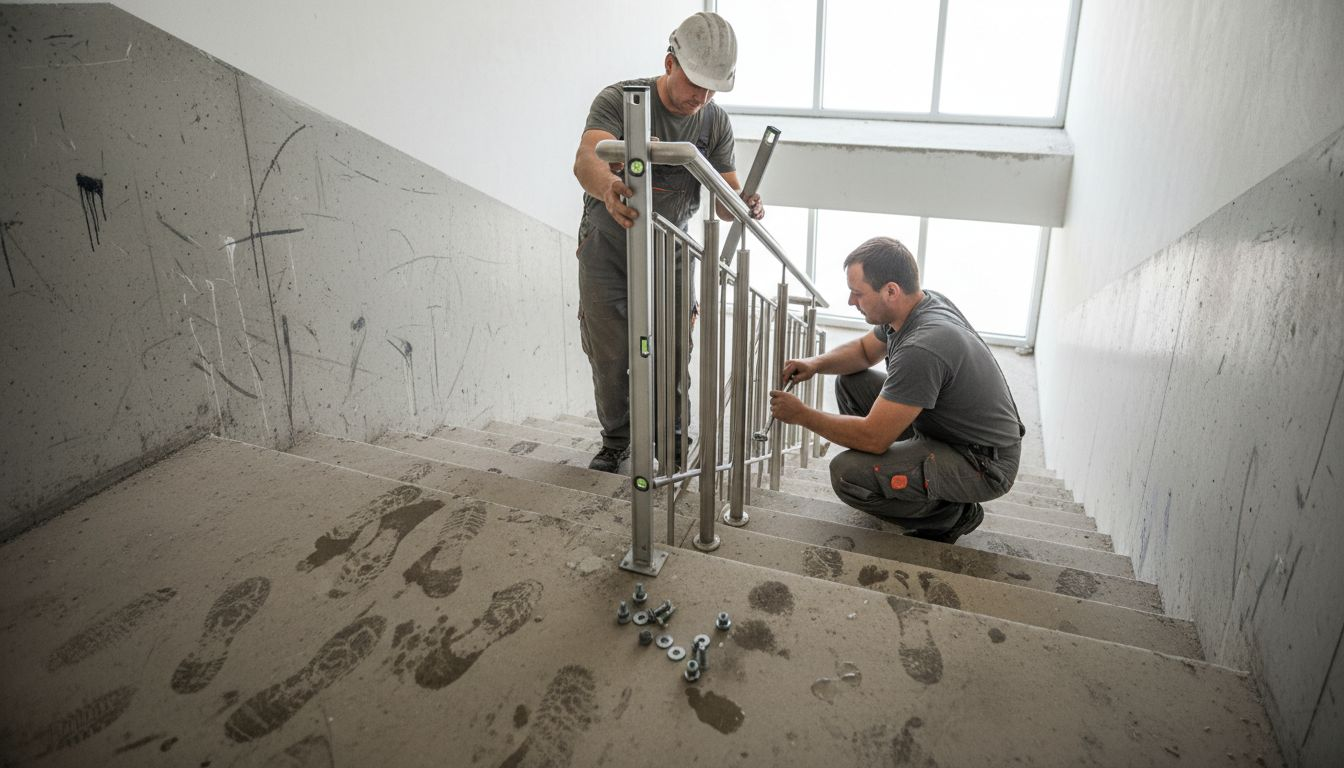
Чести грешки и успешни монтажни практики
Монтажът на парапети изисква изключителна прецизност и внимание към детайлите. Стандартите за конструиране посочват множество критични аспекти, които могат да предизвикат сериозни проблеми при неправилно изпълнение.
Чести грешки при монтаж включват:
- Неправилно определяне на разстоянията между стълбовете
- Използване на неподходящи материали с ниска корозионна устойчивост
- Повърхностно или некачествено закрепване
- Липса на предварителни изчисления за товароносимост
- Неспазване на нормативните изисквания за безопасност
Успешните монтажни практики при метални парапети включват задължителна предварителна инспекция на терена, използване на сертифицирани материали и прецизно спазване на технологичните изисквания. Препоръчително е провеждането на щателен контрол върху всеки етап от монтажа, включително качеството на заваряване, корозионна защита и точно позициониране.
Професионалните специалисти подчертават, че инвестирането във високо квалифициран монтажен екип и качествени материали многократно намалява риска от бъдещи технически проблеми и гарантира дълготрайност на конструкцията.
Професионален съвет: Винаги документирайте всеки етап от монтажа с подробни снимки и протоколи, което ще улесни евентуални бъдещи проверки и гаранционни процедури.
Осигурете перфектна безопасност и изящество с правилния монтаж на инокс парапети
Статията подчертава колко критичен е монтажът за надеждността и естетиката на парапетите особено тези от висококачествен инокс. Основните предизвикателства са свързани с правилната височина стабилността на закрепването и спазването на стандарти за безопасност. Необходимостта от устойчивост на корозия прецизни изчисления и професионален монтаж са ключови за дълготрайна и сигурна конструкция.
В Inoxify.bg разбираме тези изисквания и предлагаме готови решения от неръждаема стомана AISI 304 и 316 с гарантирано качество и лесен монтаж за всякакви архитектурни проекти. Нашите инокс парапети са създадени с мисъл за безопасност и изискан дизайн подходящи както за вътрешна така и външна употреба.
Изберете най-подходящия парапет за вашия проект и се доверете на професионално производство и експресна доставка.
Вземете правилното решение за вашата безопасност и визия сега. Посетете Inoxify.bg за подробна информация и поръчка на инокс парапети с експертна консултация и гаранция за качество.
Често задавани въпроси
Какви са основните функции на парапетите?
Парапетите служат за предотвратяване на падания, създаване на естетически завършек на пространството и обозначаване на граници и зони.
Какви са критичните изисквания за монтаж на инокс парапети?
Критичните изисквания включват височина на парапета, разстояние между вертикалните стойки, товароносимост, начин на закрепване и гладкост на повърхността.
Как да избера подходящ тип инокс парапет?
Изборът на тип инокс парапет зависи от спецификите на средата, естетическите предпочитания и нормативните стандарти за безопасност.
Какви са често срещаните грешки при монтажа на парапети?
Често срещаните грешки включват неправилно определяне на разстоянията между стълбовете, използване на неподходящи материали, некачествено закрепване и неспазване на нормативните изисквания.
Свързани страници в Inoxify
Разгледайте нашите специализирани секции за оферти, цени с монтаж и техническа информация:
- Парапети – главна
- Парапети за тераси
- Парапети за стълбища
- Иноксови парапети за тераса
- Иноксови парапети за стълбище
Препоръчани
- Алуминиев или Иноксов парапет – Кое да изберем? – Inoxify
- Решетка или стъкло? Няколко идеи за избор на парапет – Inoxify
- Частен дом, гр. София – Inoxify
- Иноксов парапет тип решетка – Челопечене – Inoxify
- Varför behövs säkerheter enligt entreprenadjuridik? - Maleon
- 7 Belangrijke Veiligheidsvoordelen Kozijnen voor Huiseigenaren